How to build an Ethereum wallet app with React Native | Chapter 3 | The transaction


In the first two parts of this article series, we built the first steps of an Ethereum wallet. At this point, we can create a new wallet on the Ethereum and Polygon chains within our application and we can restore the account via the mnemonic words. If you missed the articles, I suggest checking them first:
How to build an Ethereum wallet app with React Native | Chapter 1 | The wallet
How to build an Ethereum wallet app with React Native | Chapter 2 | The multi-currency wallet
In this article, we are going to build further the application by adding the ability to send transactions from our account to another one. By the end of this article, you will be able to send Ether and Matic tokens to other valid addresses.
Technical overview
The article focuses on sending transactions between valid addresses. In the examples, we will use the Polygon address to send Matic tokens because it is much faster than sending Ethereum tokens however because the Ethereum and Polygon addresses have the same format, the implemented solution will also work with the Ethereum address. Please note, that even though you will be able to send both tokens from the wallet, you can not mix the tokens. From the Polygon address, you can send only Matic tokens, and from the Ethereum address, you can send Ethereum tokens in our wallet app. First, let's see the technical overview of these two functionalities.
Sending transactions
The method of sending a transaction is the same on both networks. In this article, we will cover only the case when the user can send tokens to an address on the same network, so we won't cover cross-chain transactions as we discussed in the previous section.
Let's review briefly how a transaction works on the Ethereum and Polygon networks
The sender initiates the transaction: The sender specifies the recipient address, the amount of the tokens or assets to be sent, and any optional data that needs to be included in the transaction.
The transaction is broadcasted to the network: The transaction is broadcasted to the network, where it is picked up by a node that adds it to the mempool. The mempool is a list of unconfirmed transactions waiting to be processed by the network.
Validators validate and confirm the transaction: Validators validate and confirm the transaction by adding it to a block and signing it with their private key.
Block is added to the blockchain: Once the block containing the transaction is validated and confirmed, it is added to the blockchain and becomes a permanent part of the ledger. At this point, the transaction is considered confirmed and the tokens or assets are transferred from the sender to the recipient.
Gas fees are paid to the validator: The gas fee is a measure of the computational effort required to execute the transaction and is determined by the sender based on the current network conditions and the priority of the transaction.
We only need to implement the first and the first part of the second bullet points, the rest of the steps are handled by the network and the validators.
Technical prerequisites
To complete this part of the wallet development, you need the code base from the first part of this article series. You can review or download the code base from Github.
Address faucet
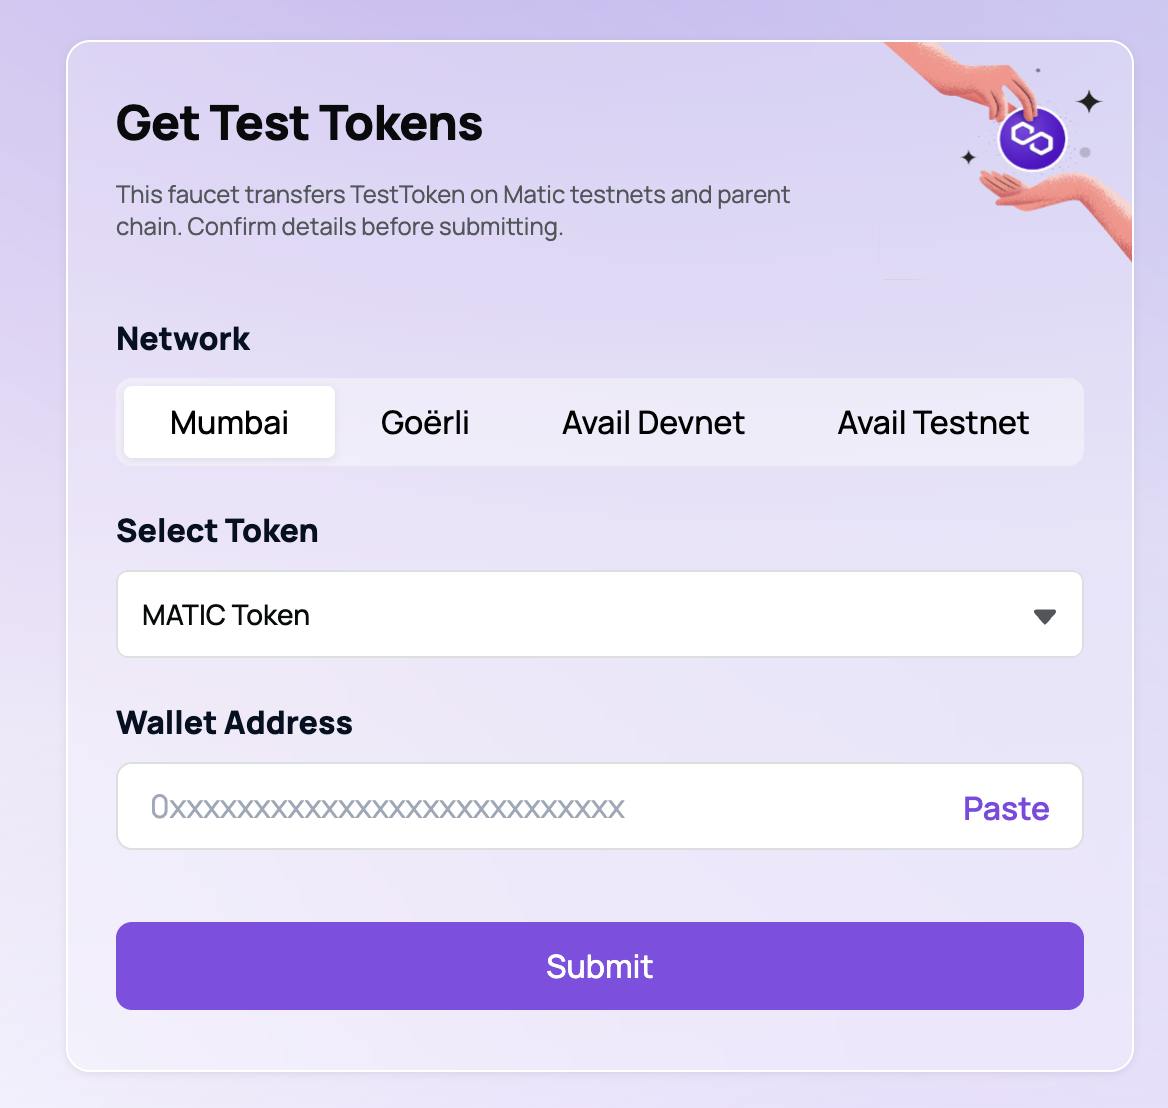
With faucet apps or websites, we can top-up or test addresses with a small amount of tokens. This will be the base fund that helps us test the transactions. For the Polygon network, we will use the official Polygon faucet website to send some tokens to our address.
In the previous article, we used the Infura endpoint of the Mumbai test network, so on the faucet website, let's choose the Mumbai network option and then copy and paste the address from the app. As we discussed before, the addresses are the same on the Ethereum and Polygon networks, so you don't have to worry about copying the other network address. Finally, press the Submit button.
Once the transaction is accepted, you can check the transaction on the Mumbai polygonscan website. Use the search bar with the address, and under the Internal Txns option, you can review the transaction.

If you reload the main page of our mobile wallet application, you can see the updated balance on the token card. Now we are ready to implement the transaction functionality and send some Matic tokens from our account.
Sending transactions
We already have a Send button on the card component, now we will implement the functionality after pressing this button. At first, the app captures the press event and shows an action sheet where the user can enter the required data, then the app shows the review page where the user can review the transaction details and finally press the button to finalize the transaction.

In the following sections, let's review the new components and functionalities.
Transaction sheet components
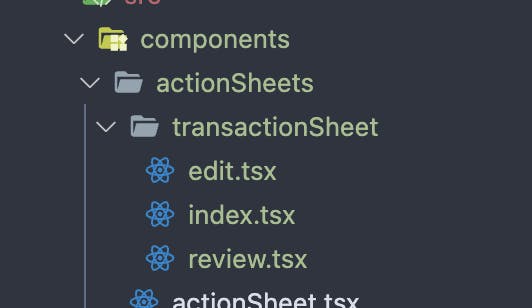
For the transaction sheet component, let's create a new folder under the actionSheet component folder. In the folder let's have three files, an index.tsx file that is the wrapper and contains the logic, an edit.tsx file that covers the transaction input fields, and a review.tsx file where the user can review the transaction details before finalizing it. The wrapper will render the edit or the review component based on the current state.
First, let's review the edit and review components because these are only simple, stateless components. We will control these from the index.tsx wrapper file.
# src/components/actionSheet/transactionSheet/edit.tsx

export const Edit: React.FunctionComponent<Props> = ({
  isLoading,
  currencyName,
  estimatedGasPrice,
  errorMessage,
  transactionAmount,
  setTransactionAmount,
  transactionToAddress,
  addressErrorMessage,
  setTransactionToAddress,
  setVisible,
  onContinue,
}) => (
  <>
    <View>
      <Header title={`Send ${currencyName}`} type="secondary" />

      <Text style={styles.description}>
        Send a selected amount to the entered address. Make sure you typed the address correctly, we can not restore the ammount after a wrongly addressed transaction!
      </Text>
    </View>

    <View style={styles.sectionContainer}>
      <Input
        placeholder="Enter the address"
        value={transactionToAddress}
        onChange={setTransactionToAddress}
        errorMessage={
          addressErrorMessage ? addressErrorMessage.toString() : undefined
        }
        autoFocus
      />
      <Input
        placeholder="Enter the amount"
        keyboardType="numeric"
        value={transactionAmount}
        onChange={setTransactionAmount}
        postfix={currencyName}
        errorMessage={errorMessage ? errorMessage.toString() : undefined}
      />
      {estimatedGasPrice ? (
        <View style={styles.estimatedGasContainer}>
          <Text style={styles.estimatedGas}>{`Estimated gas fee: ${estimatedGasPrice} ${currencyName}`}</Text>
        </View>
      ) : null}
    </View>
    <View style={styles.sectionContainer}>
      <Button
        isLoading={isLoading}
        disabled={
          !transactionToAddress ||
          !transactionAmount ||
          !!errorMessage ||
          !!addressErrorMessage
        }
        onPress={onContinue}>
        Review
      </Button>
      <Button type="tertiary" onPress={() => setVisible(false)}>
        Cancel
      </Button>
    </View>
  </>
);
# src/components/actionSheet/transactionSheet/review.tsx

export const Review: React.FunctionComponent<Props> = ({
  isLoading,
  currencyName,
  transactionFromAddress,
  transactionToAddress,
  estimatedGasPrice,
  transactionAmount,
  setVisible,
  onContinue,
  onBack,
}) => (
  <>
    <View>
      <Header title="Review the transaction" type="secondary" onBack={onBack} />
      <Text style={styles.description}>
        Send a selected amount to the entered address. Make sure you typed the address correctly, we can not restore the ammount after a wrongly addressed transaction!
      </Text>
    </View>

    <View style={[styles.sectionContainer, styles.transactionContainer]}>
      <View>
        <Text style={styles.label}>Sending transaction from</Text>
        <Text style={styles.value}>{transactionFromAddress}</Text>
      </View>
      <View>
        <Text style={styles.label}>Sending transaction to</Text>
        <Text style={styles.value}>{transactionToAddress}</Text>
      </View>
      <View>
        <Text style={styles.label}>Transaction amount</Text>
        <Text style={styles.value}>{`${transactionAmount} ${currencyName}`}</Text>
      </View>
      <View>
        <Text style={styles.label}>Estimated gas fee</Text>
        <Text style={styles.value}>
          {`${estimatedGasPrice} ${currencyName}` ?? 'N/A'}
        </Text>
      </View>
    </View>

    <View style={styles.sectionContainer}>
      <Button onPress={onContinue} isLoading={isLoading}>
        Send
      </Button>
      <Button
        disabled={isLoading}
        type="tertiary"
        onPress={() => setVisible(false)}>
        Cancel
      </Button>
    </View>
  </>
);
The wrapper component stores information about the transaction and renders the right component based on the current state. For keeping the component clean, we move the big part of the transaction logic into a new custom hook and we use the hook in this component.
# src/components/actionSheet/transactionSheet/index.tsx

export const TransactionSheet: React.FunctionComponent<Props> = ({
  account,
  currencyKey,
  currencyName,
  isVisible,
  setVisible,
}) => {
  const {lib} = useConfig(currencyKey);
  const [isReviewStep, setReviewStep] = useState(false);

  const {
    isLoading,
    errorMessage,
    estimatedGasPrice,
    transactionAmount,
    setTransactionAmount,
    transactionToAddress,
    addressErrorMessage,
    setTransactionToAddress,
    sendTransaction,
  } = useTransaction({
    account,
    web3Instance: lib,
  });

  const onReview = () => {
    if (
      transactionToAddress &&
      transactionAmount &&
      !errorMessage &&
      !addressErrorMessage
    ) {
      setReviewStep(true);
    }
  };

  const onSendTransaction = async () => {
    await sendTransaction();
    setVisible(false);
  };

  useEffect(() => {
    if (!isVisible) {
      // cleanup
      setTransactionAmount('');
      setTransactionToAddress('');
      setReviewStep(false);
    }

    // eslint-disable-next-line react-hooks/exhaustive-deps
  }, [isVisible]);

  if (!account) {
    return null;
  }

  return (
    <ActionSheet isVisible={isVisible} setVisible={setVisible}>
      {!isReviewStep ? (
        <Edit
          isLoading={isLoading}
          currencyName={currencyName}
          errorMessage={errorMessage}
          estimatedGasPrice={estimatedGasPrice}
          transactionAmount={transactionAmount}
          addressErrorMessage={addressErrorMessage}
          setTransactionAmount={setTransactionAmount}
          transactionToAddress={transactionToAddress}
          setTransactionToAddress={setTransactionToAddress}
          setVisible={setVisible}
          onContinue={onReview}
        />
      ) : (
        <Review
          isLoading={isLoading}
          currencyName={currencyName}
          transactionFromAddress={account.address}
          estimatedGasPrice={estimatedGasPrice}
          transactionToAddress={transactionToAddress}
          transactionAmount={transactionAmount}
          setVisible={setVisible}
          onContinue={onSendTransaction}
          onBack={() => setReviewStep(false)}
        />
      )}
    </ActionSheet>
  );
};
Web3 library
Before we would review the transaction hook, let's define new functions in the Web3 lib to support the hook functionalities. We need three new web3 functions:
Validating an address: This function will help us to initiate the transaction only if the given address is valid.
Calculating the gas fee: A gas fee is an additional fee that the sender user has to pay to the validators in order to process the transaction. Because we want to build a transparent wallet app, we want to show the user an estimation of how much additional token is needed for the transaction.
Sending the transaction: The user signs the transaction with the private key and then sends the signed data to the network.
# src/libs/web3/index.ts

...
const estimateGasPrice = async (
    address: string,
    amount: string,
  ): Promise<string> => {
    const gasPriceText = await web3Instance.eth.getGasPrice();
    const gasPrice = convertStringToNumSafely(gasPriceText);
    const amountValue = web3Instance.utils.toWei(amount, 'ether');
    const estimatedGas = await web3Instance.eth.estimateGas({
      from: address,
      value: amountValue,
    });

    return web3Instance.utils.fromWei(String(gasPrice * estimatedGas), 'ether');
  };

const isValidAddress = (address: string) =>
    web3Instance.utils.isAddress(address);

const sendTransaction = async (
    props: TransactionProps,
  ): Promise<TransactionReceipt | null> => {
    const nonce = await web3Instance.eth.getTransactionCount(
      props.addressFrom,
      'latest',
    );
    const valueToWei = web3Instance.utils.toWei(props.amount, 'ether');

    const gasPrice = await web3Instance.eth.getGasPrice();

    const estimatedGas = await web3Instance.eth.estimateGas({
      from: props.addressFrom,
      value: valueToWei,
    });

    const rawTransaction: TransactionConfig = {
      from: props.addressFrom,
      to: props.addressTo,
      value: valueToWei,
      nonce,
      gasPrice,
      gas: estimatedGas,
    };

    const signedTransaction = await web3Instance.eth.accounts.signTransaction(
      rawTransaction,
      props.privateKey,
    );

    if (!signedTransaction.rawTransaction) {
      throw new Error('Transaction signature failed!');
    }

    return web3Instance.eth.sendSignedTransaction(
      signedTransaction.rawTransaction,
    );
  };
...
Transaction hook
This hook will manage the transaction details and it defines the necessary functions to complete a transaction. It also contains a few functions to calculate the estimated gas fee and validate the receiver address. As an extra functionality, we use debounced input values because it is unnecessary to validate the address and calculate the gas fee estimation on every character change that happened in the input field.
# src/hooks/useTransaction.ts

export const useTransaction: UseTransaction = ({account, web3Instance}) => {
  const {isLoading, withLoading} = useLoading();
  const [transactionToAddress, setTransactionToAddress] = useState<string>('');
  const [transactionAmount, setTransactionAmount] = useState<string>('');
  const [estimatedGasPrice, setEstimatedGasPrice] = useState<string | null>(
    null,
  );
  const [errorMessage, setErrorMessage] =
    useState<TransactionsErrorMessages | null>(null);

  const debouncedTransactionAmount = useDebounce(transactionAmount, 500);
  const debouncedTransactionToAddress = useDebounce(transactionToAddress, 500);

  const addressErrorMessage =
    !web3Instance ||
    !debouncedTransactionToAddress ||
    web3Instance.isValidAddress(debouncedTransactionToAddress)
      ? null
      : TransactionsErrorMessages.INVALID_RECEIVER_ADDRESS;

  const estimateGasPrice = (amount: string): Promise<string | null> =>
    withLoading(async () => {
      try {
        if (account && web3Instance && parseFloat(amount)) {
          const price = await web3Instance.estimateGasPrice(
            account.address,
            amount,
          );
          return price;
        }
        return null;
      } catch (error) {
        const message = (error as Error).message;
        if (message.includes('insufficient funds')) {
         setErrorMessage(TransactionsErrorMessages.INSUFFICIENT_FUND);
        }
        return null;
      }
    });

  const _setTransactionAmount = (value: string) => {
    setErrorMessage(null);
    setTransactionAmount(value);
  };

  const sendTransaction = () =>
    withLoading(async () => {
      try {
        if (!web3Instance || !account) {
          throw new Error(
            'Internal error, the transaction cannot be fulfilled!',
          );
        }
        const res = await web3Instance?.sendTransaction({
          addressFrom: account.address,
          addressTo: debouncedTransactionToAddress,
          amount: debouncedTransactionAmount,
          privateKey: account.privateKey,
        });

        return res;
      } catch (error) {
        return null;
      }
    });

  useEffect(() => {
    if (web3Instance) {
estimateGasPrice(debouncedTransactionAmount).then(setEstimatedGasPrice);
    }
    // eslint-disable-next-line react-hooks/exhaustive-deps
  }, [debouncedTransactionAmount]);

  return {
    isLoading,
    errorMessage,
    addressErrorMessage,
    estimatedGasPrice,
    transactionAmount,
    setTransactionAmount: _setTransactionAmount,
    transactionToAddress,
    setTransactionToAddress,
    sendTransaction,
  };
};
Home screen
The Home screen renders the new action sheet and controls its visibility by a state variable. We track the active currency that we want to use as a sender account by the selectedIndex state variable.
# src/screens/Home.tsx

export const HomeScreen: React.FunctionComponent<Props> = ({}) => {
  ...
  const [isSendOpen, setSendOpen] = useState(false);

  const _setActiveCurrency = (active: number) => {
    setSendOpen(false);
    setSelectedIndex(active);
  };

  ...

  return (
    <SafeArea>
      <View style={styles.container}>
        <View style={styles.content}>
          {isLoading ? (
            <ActivityIndicator size={'small'} color={BLUE} />
          ) : (
            <>
              <Pager onPageSelected={_setActiveCurrency}>
                {data.map(currencyData => (
                  <CurrencyCard
                    key={currencyData.name}
                    name={currencyData.name}
                    balance={currencyData.balance}
                    postfix={currencyData.postfix}
                    onReceive={() => ({})}
                    onSend={() => setSendOpen(true)}
                  />
                ))}
              </Pager>
            </>
          )}
        </View>
      </View>

      <SendCurrencySheet
        account={data[selectedIndex].account}
        currencyName={data[selectedIndex].postfix}
        currencyKey={data[selectedIndex].name}
        isVisible={isSendOpen}
        setVisible={setSendOpen}
      />
    </SafeArea>
  );
};
The app doesn't listen to the address's changes yet, so after the transaction, we have to reload the wallet application to get the latest balance value on the home screen. You can also double-check the transaction on the polygonscan website, as we did with the faucet before. If you search for the sender's address, you can find the out transaction in the table or if you search for the receiver address, you can see the in transaction at the top of the table.


You can easily create another account for yourself within our wallet application, just press Sign out on the Profile screen and then Create Wallet. Don't forget to write down the address of your first account to be able to use it as the beneficiary when you initiate a transaction in the new account. And you may need the recovery words and custom password as well if you want to use the first account later.
If you don't want to create a new account for some reason, feel free to use one of my addresses to send me some test tokens. Just a reminder, because the addresses are the same on both networks, you can send either Ethereum or Matic tokens to these addresses.
0x83e6dC78f18FB89CC08BD1c72A6F7C07ea7381c5
0x7975C18A3529D1460dB2b88B6dD96Cf845A10621
And because the Ethereum and Polygon networks are public blockchain networks, you can search for any addresses and review the transactions on the scan website, so if you use one of my addresses, you will find those transactions as well. Of course, if you send test Ethereum tokens instead of Matic tokens between addresses, you have to use the etherscan website of the chosen test network to review the transactions.
Final thoughts
In the third chapter, we discovered how we can send transactions from our wallet application. We built a nice UI for initiating transactions with gas price estimation, loading state, and basic error handling. We also covered how we can double-check our transactions with the scan websites.
If you enjoyed this series so far, then stay tuned for the upcoming chapters. Here is a little sneak peek of the following one:
- Building transaction history from network scan data: In this chapter, we will build a nice transaction history UI by listing only a few latest transactions and with the option to review all the transactions that happened in the past. We will use ether and polygon scan APIs to collect the transaction data.